What the POS is
The POS (Point of Sale) is your day-to-day screen: it’s where you open tables, take orders, send them to the kitchen and take payment. It’s the main tool for waiters and the floor manager during service.
The whole POS is touch-first: big buttons, instant response and nothing buried in menus. Built for tablets and touchscreens.
The table map
When you open the POS you see the restaurant floor map: tables drawn in a colour that reflects their status. Tabs along the top let you switch zones (for example Dining Room and Terrace).
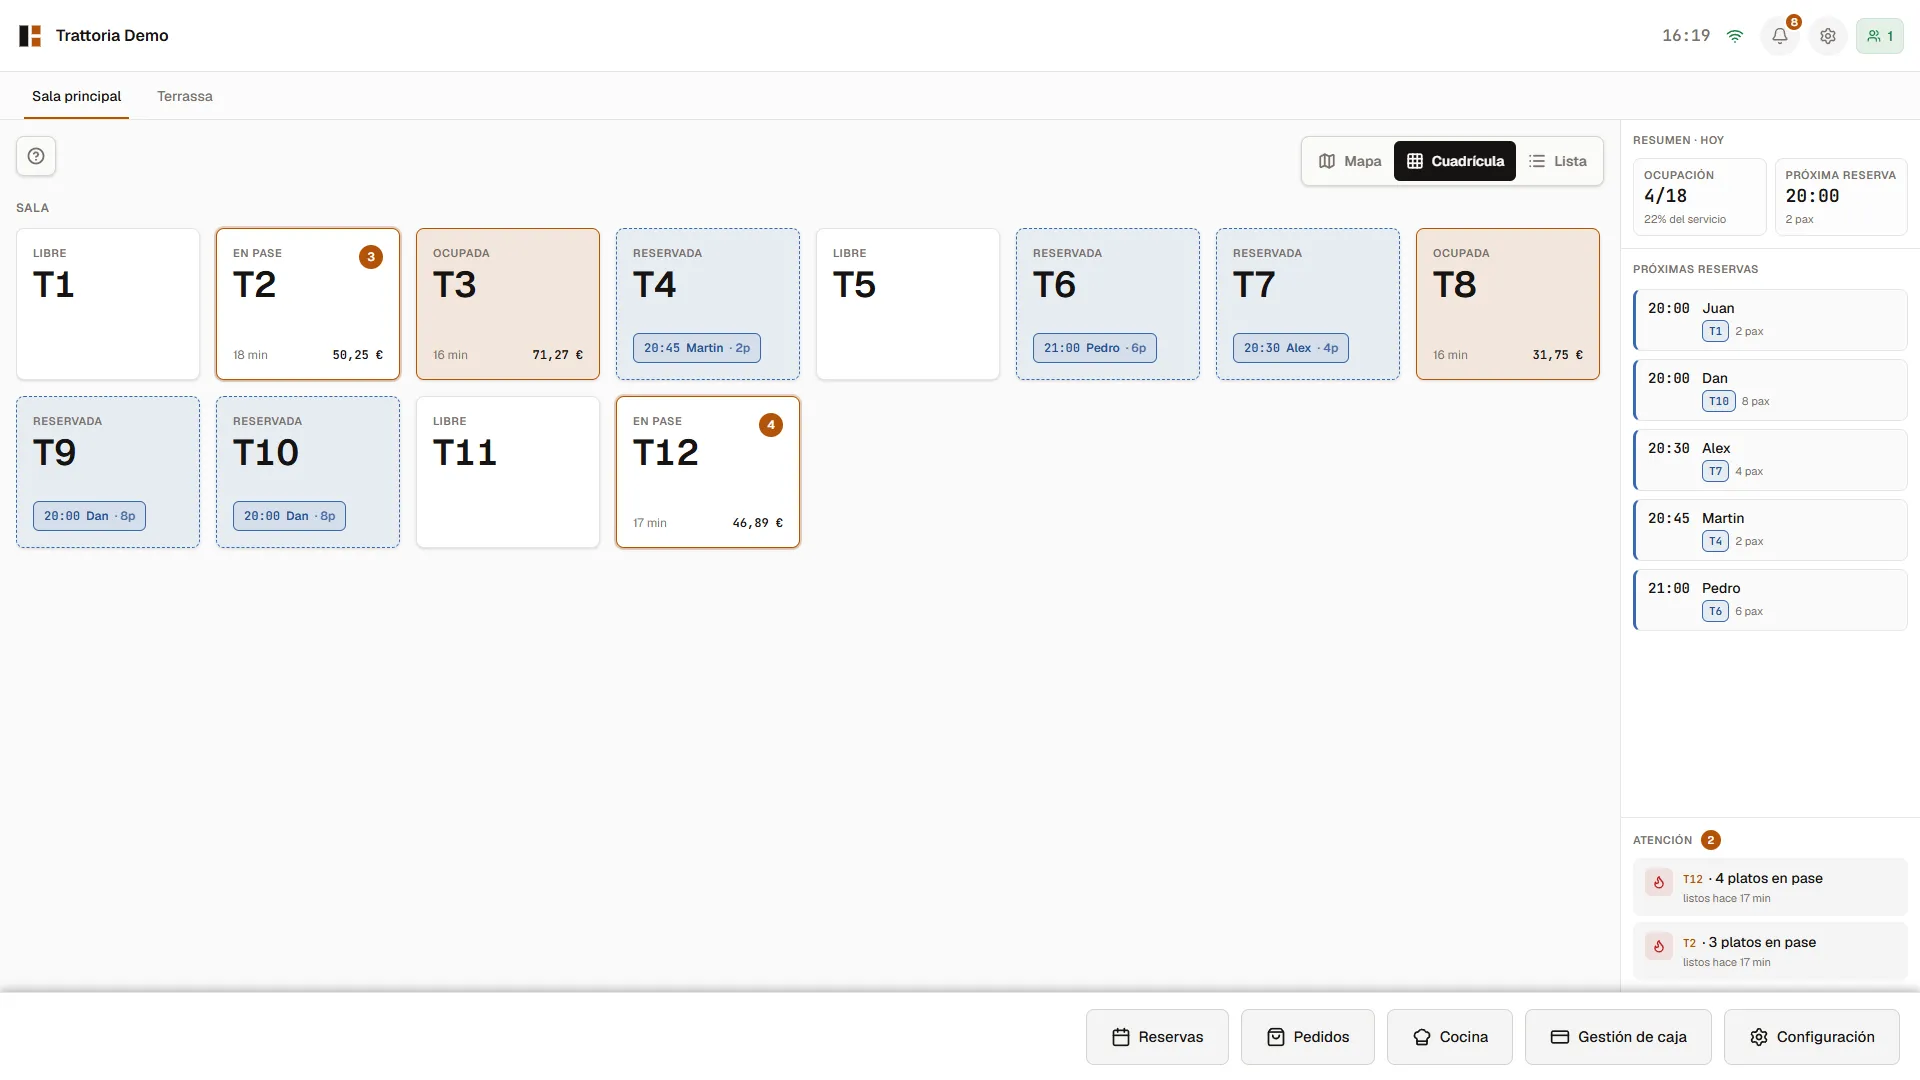 The live map: each colour shows a table’s status.
| Status | What it means |
|---|---|
| Free | Empty and available |
| Occupied | There’s an open order |
| Awaiting payment | The guests have asked for the bill |
| Reserved | There’s a booking for this table |
| Dirty | Needs cleaning before it can be used again |
Opening a table
- On the map, tap the free table where the guests have sat down.
- The Open table dialog appears with a guest count (already suggested based on the table’s capacity).
- Adjust it with the + / − buttons if needed and tap Open table.
The table turns Occupied and the order screen opens: the menu on one side and the order on the other.
Taking the order
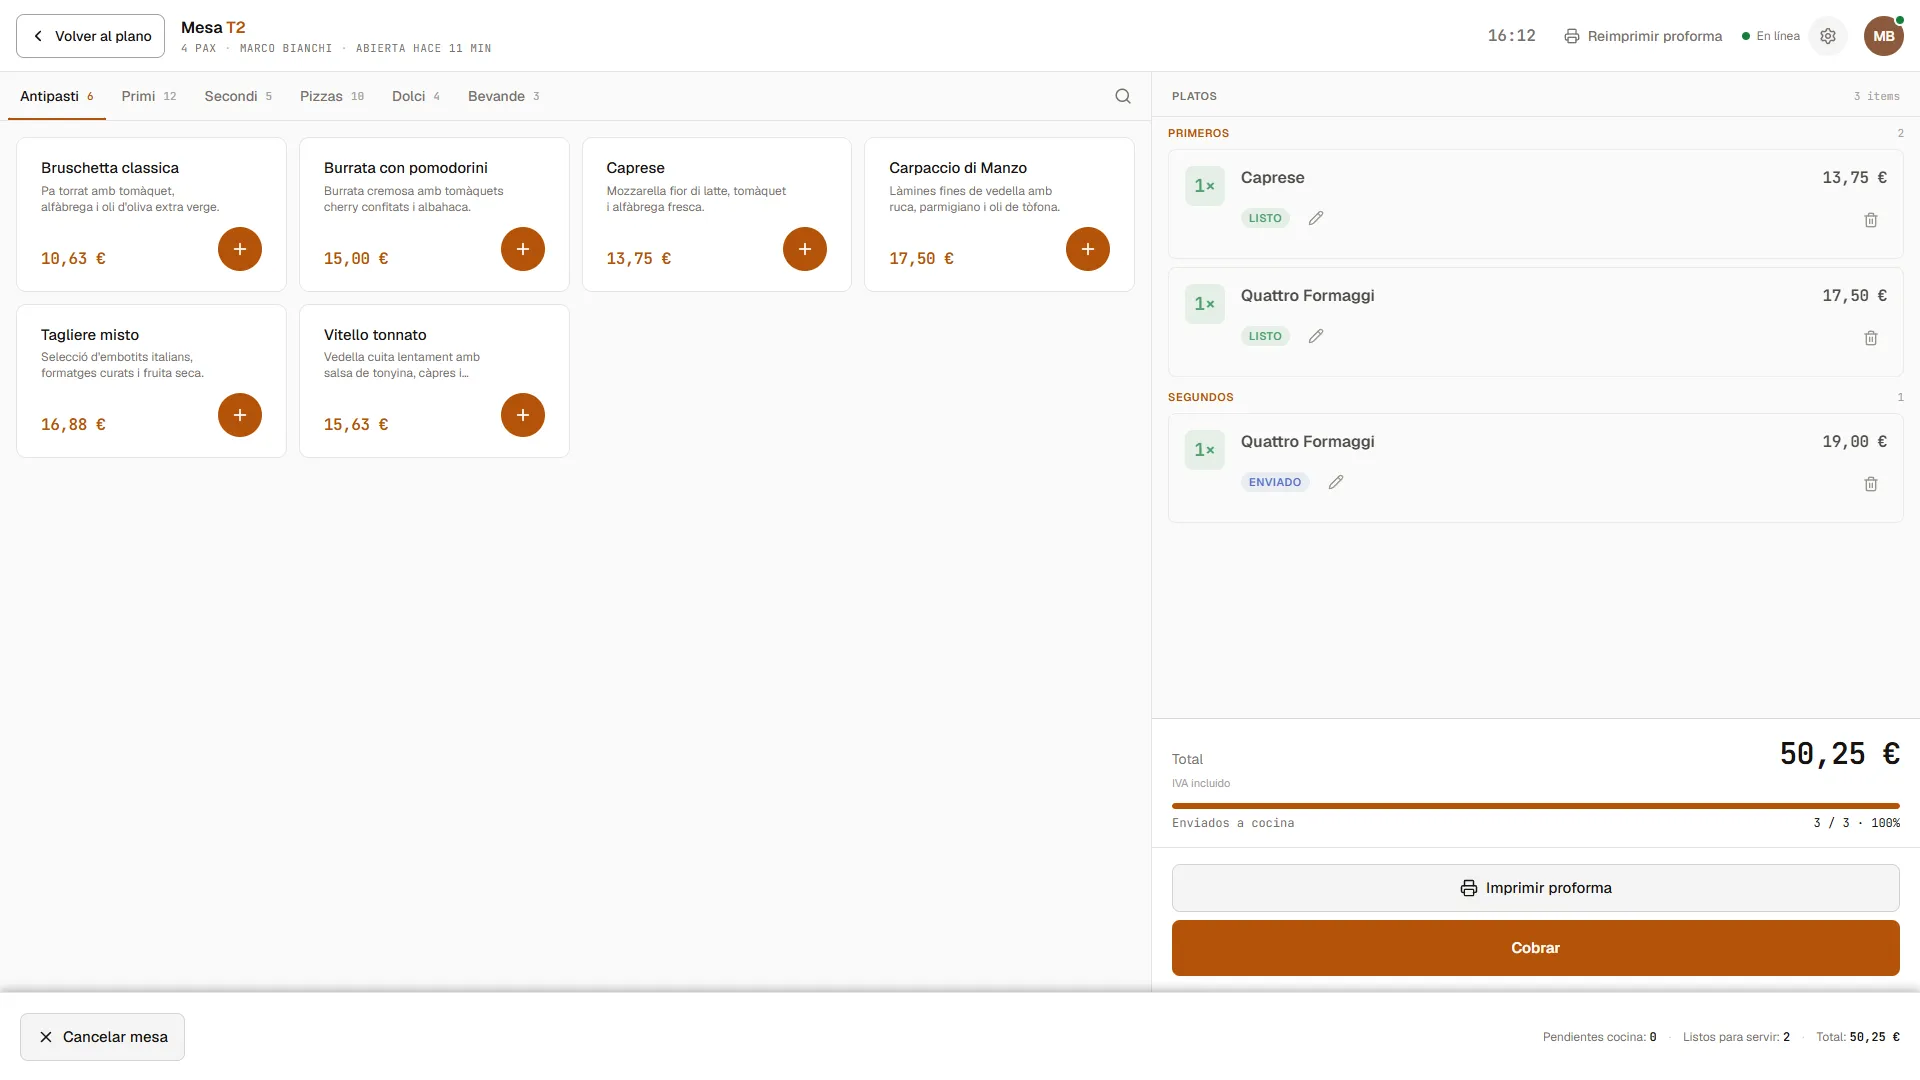 The menu by category on the left; the order on the right.
- The menu is organised by category (Antipasti, Primi, Pizzas, Desserts, Drinks…). Tap the category, then the dish.
- A quantity counter appears; adjust it and tap Add.
- If you add the same dish twice, Biga merges the lines automatically (“2× Margherita”) to keep the order tidy.
Modifiers
When you add a dish (or by tapping it afterwards) you can choose modifiers. Some are specific to the dish and some are global (Gluten-free, Lactose-free, Extra cheese, No spice, No onion, Takeaway). Some change the price; others are just a note for the kitchen.
Sending to the kitchen
Once the order is ready, tap Send (it shows the pending dishes, e.g. “Send 4”). The dishes move to Sent and reach the kitchen (KDS screen or printer, depending on your setup — see the Kitchen & KDS manual).
You can’t take payment on a table until every dish has been sent. The Pay button stays disabled while there are dishes waiting to be sent.
Taking payment
Before taking payment there must be an open cash shift (see below). Tap Pay and choose one of the four methods:
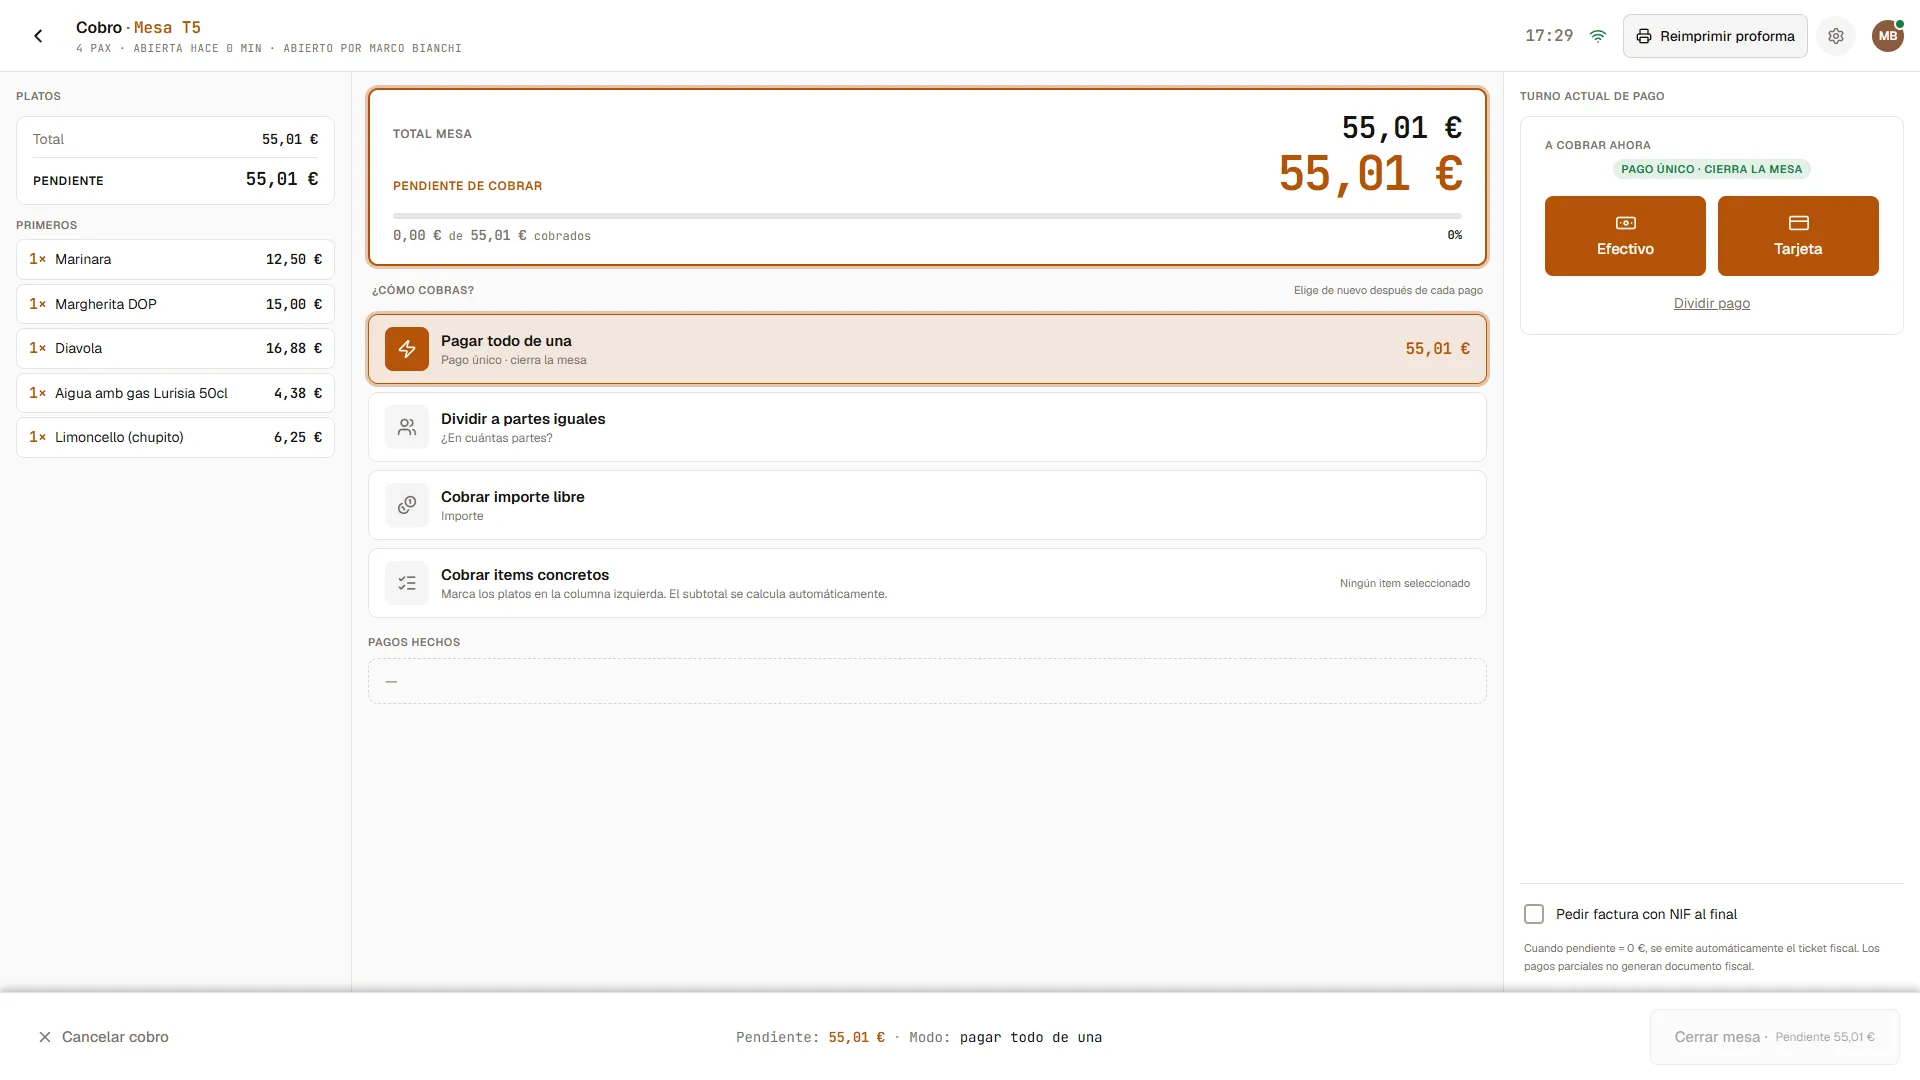 Pay all, split evenly, free amount or selected items.
- Pay all at once — the usual case.
- Split evenly — divide the total between N people.
- Charge a free amount — a specific figure (partial payments).
- Charge selected items — flag some dishes and charge only those.
Choose the method (cash or card). For cash, enter what the guest pays with and Biga works out the change.
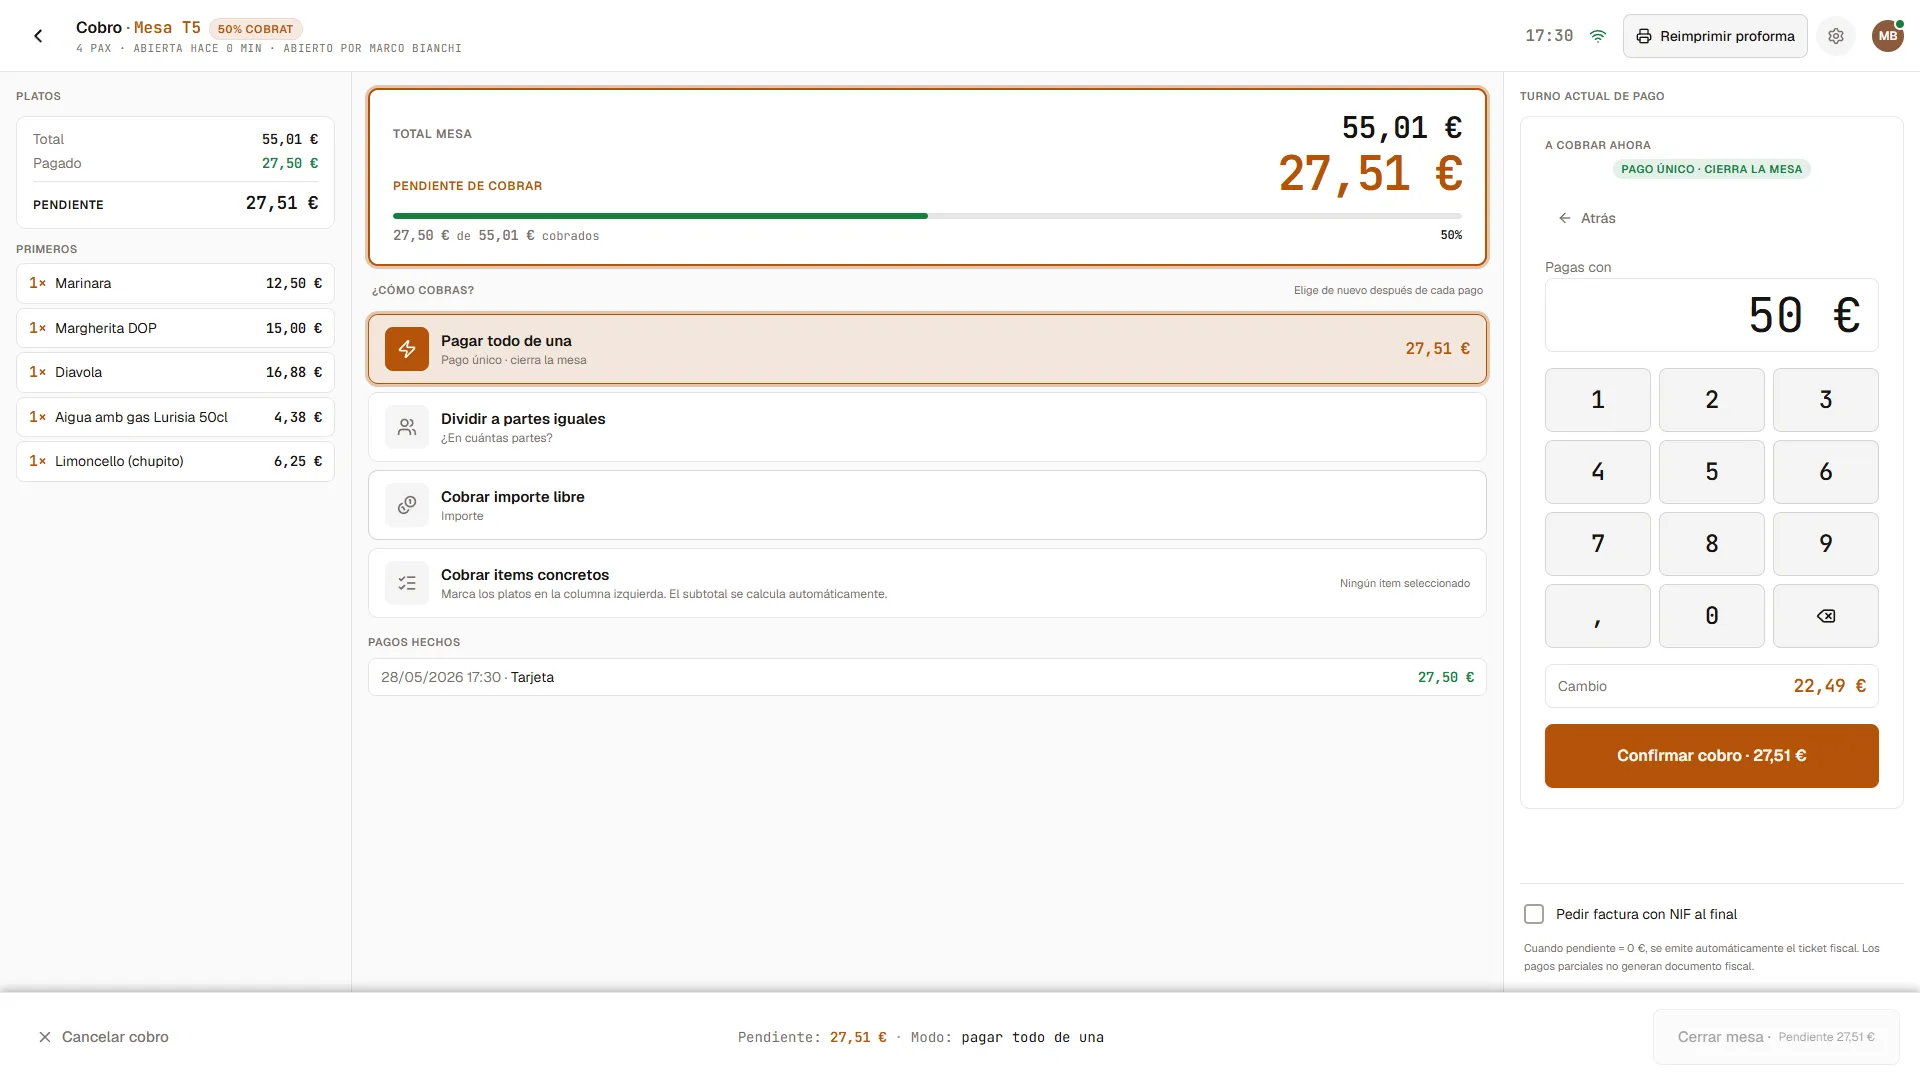 With cash, Biga calculates the change automatically.
While the table is open, the back button on the payment screen returns to the order (in case the guests want to add more dishes), not to the floor map. Once the table is closed, back takes you to the map.
One single receipt (less paper)
During service, the guest is handed the proforma: an informational document with a “PAYMENT PENDING” banner and the Net + VAT breakdown. It is not a fiscal document.
When the balance reaches €0, the table closes and the fiscal receipt (series T) is always generated, with its sequential number intact. However, it is not printed automatically by default: it only comes out on paper if
- you tap the Print receipt button at the end of the payment (it can be reprinted as many times as needed), or
- you have the Print the fiscal receipt automatically on payment option enabled under Settings → Receipts.
The table turns Dirty.
Invoice with tax ID (NIF)
If the guest wants an invoice with a tax ID (NIF), tick “Request invoice with NIF at the end” on the payment screen and fill in the tax details. Instead of a receipt, a B2B invoice is issued. You can also turn a receipt into an invoice later (see Invoicing).
The cash shift
Taking payment requires an open cash shift. You open it at the start of service from Cash management: choose the shift type (lunch, dinner or continuous) and enter the opening float.
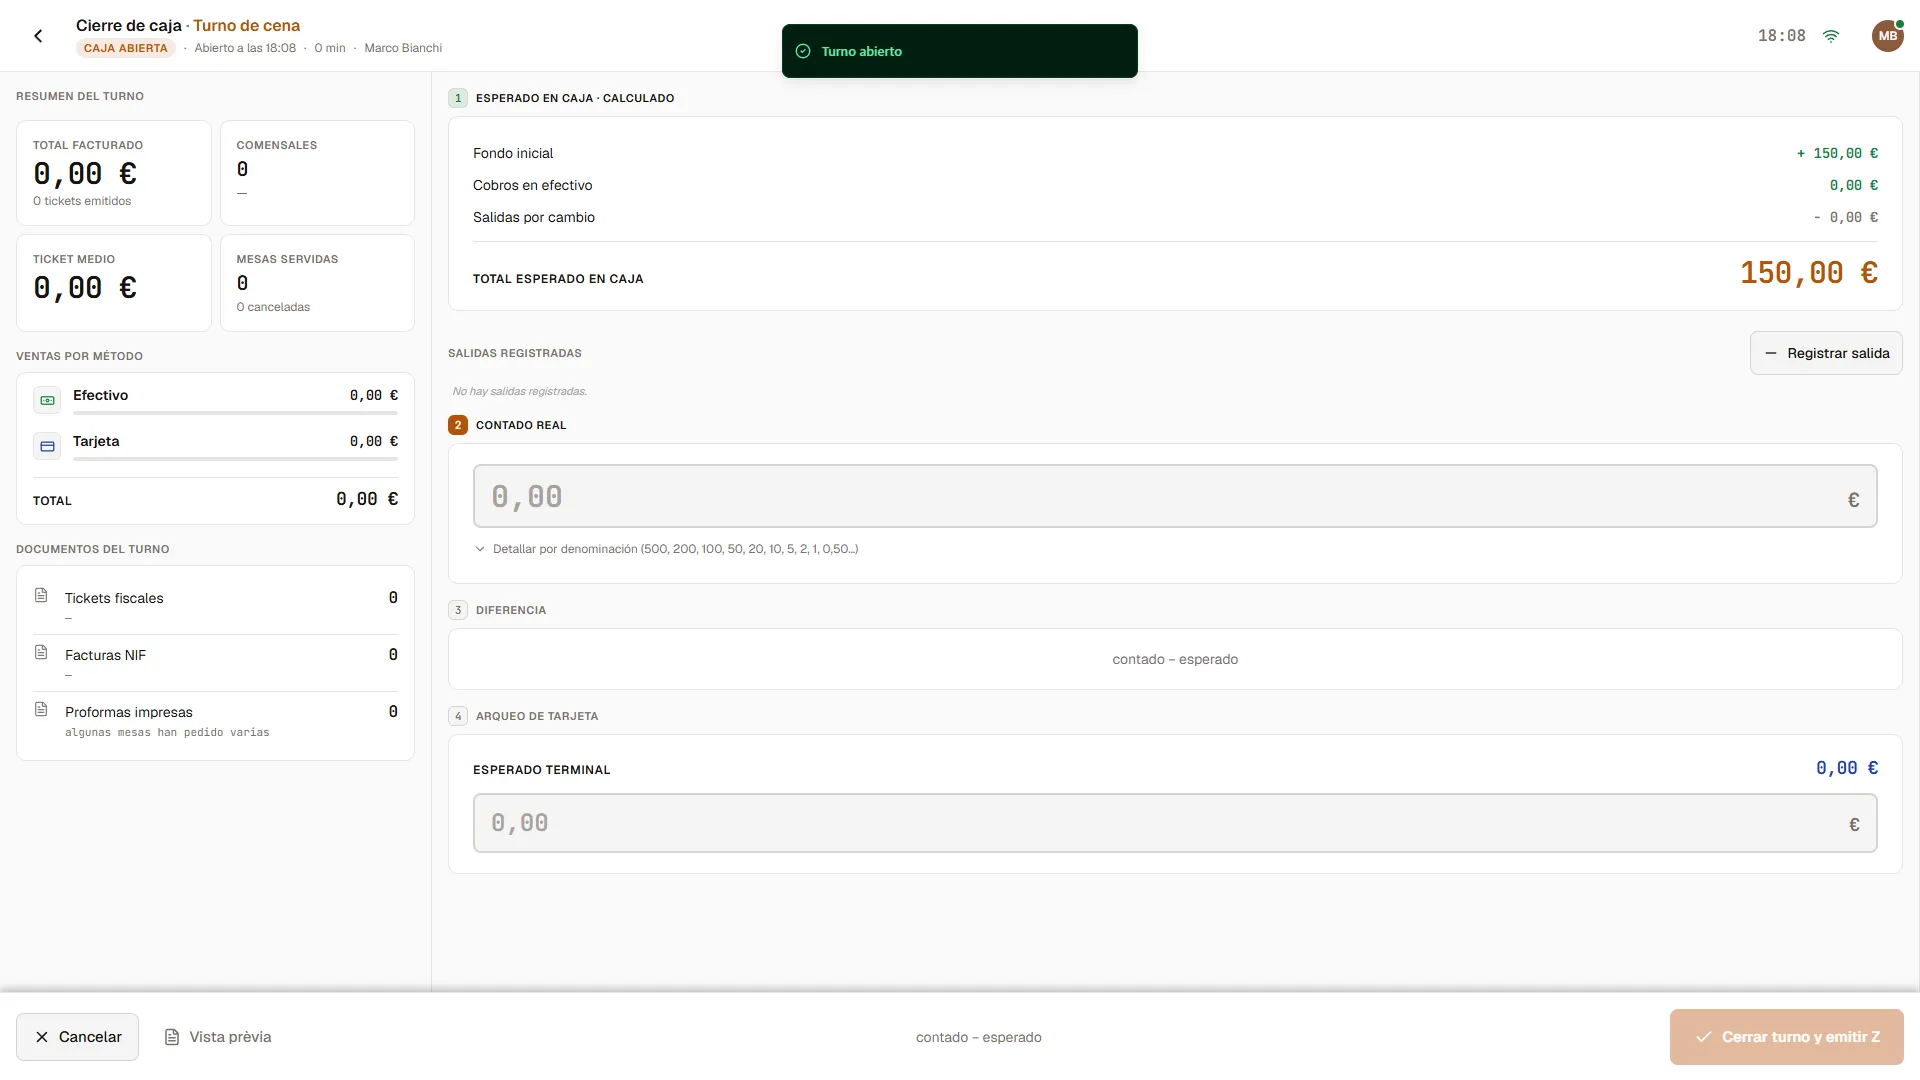 On closing, Biga compares the counted cash with the expected amount and shows the difference.
To close (end of service): go back to Cash management, enter the counted cash and the card takings, add notes if needed and tap Close and print. Opening and closing the cash drawer requires the admin PIN.
Common errors
- The “Pay” button is greyed out → there are dishes still waiting to be sent to the kitchen. Tap Send first.
- “Can’t take payment — no cash shift is open” → open a shift in Cash management.
- “No connection. Retry” → a brief drop; wait a few seconds and try again.